
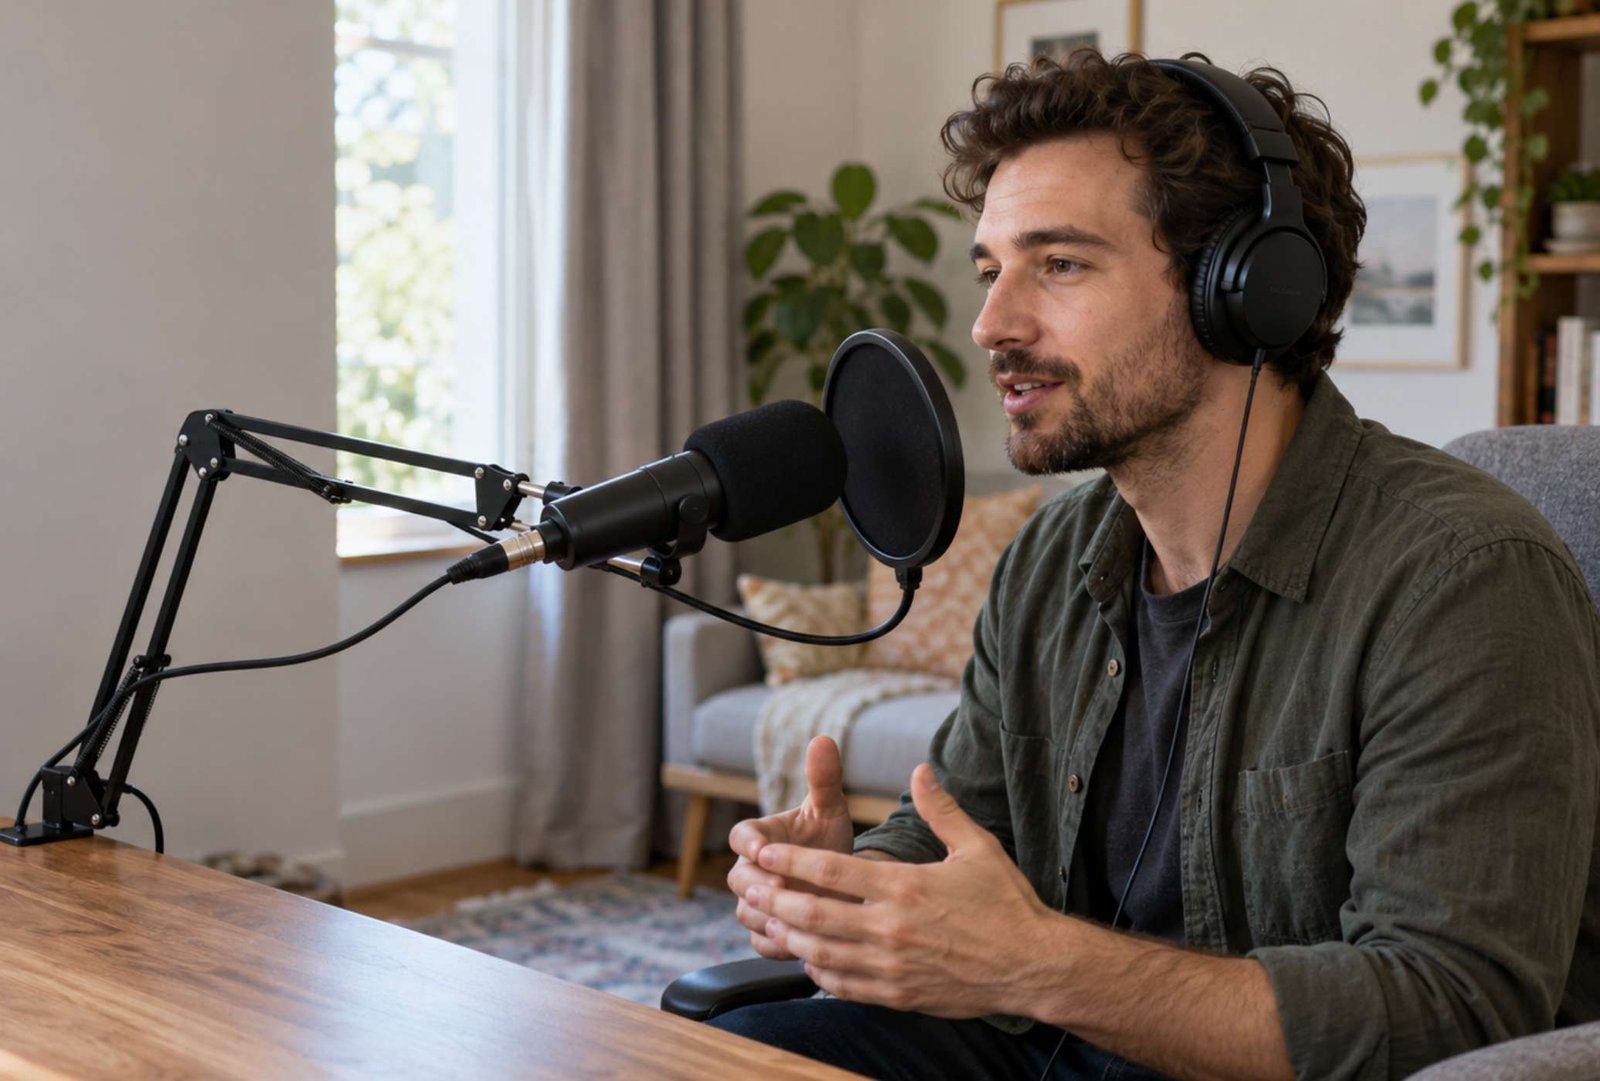
You finish recording a tutorial, open the footage, and discover that the voice sounds distant. A computer fan is audible between sentences, some words are much louder than others, and the background music makes the instructions difficult to follow.
Turning up the volume will not solve all of those problems. It can make the unwanted sounds louder along with the speech.
Clear dialogue starts with the recording setup. Editing then helps correct specific problems and make the finished video comfortable to listen to.
This guide covers a practical workflow for a single person recording tutorials, commentary, or presentations indoors. It includes microphone placement, a short recording test, basic editing, optional noise cleanup, music balance, and final playback checks. You can apply the principles in your existing editor, with specific examples for Audacity and Adobe Premiere.
1. Identify the problem before applying an effect
Several audio problems can sound vaguely “bad” while requiring different solutions.
Listen to an untreated recording and identify the main issue:
| What you hear | Likely problem | First action to try |
|---|---|---|
| A distant voice with a lingering room sound | Too much reflected sound relative to direct speech | Change microphone placement and recording position |
| A steady hiss or mechanical hum | Background noise or noise in the recording chain | Identify the source before processing |
| Harsh crackling on loud words | Possible clipping or overload | Lower the recording input level and test again |
| Heavy bursts on words beginning with “p” or “b” | Air hitting the microphone | Adjust the angle and use a pop filter |
| Large changes in volume between sentences | Inconsistent delivery, distance, or recording levels | Improve consistency and adjust individual sections |
| Clear speech alone but unclear speech with music | An unsuitable music balance | Lower or simplify the music |
These are starting points for diagnosis, not definitive explanations. Crackling, for example, can also come from a connection or recording problem.
Keep an untouched copy of the original audio. Apply your changes to a working copy or use effects that you can disable.
Before adding an effect, finish this sentence: “I am using this because I can hear…” If you cannot name the problem, leave the effect off until you can.
2. Choose the quietest useful recording position
The room that looks best on camera may not be the best place to record a voice.
Make a short recording in two possible positions before arranging the entire shoot. Listen for fans, traffic, appliances, keyboard noise, and reflections from hard surfaces.
A furnished room with curtains, a rug, and upholstered furniture is a useful place to begin. Keep the microphone away from obvious noise sources and experiment with its orientation. Shure recommends making sample recordings because microphones can capture background sounds that people overlook while standing in the room. Read Shure’s home-recording guidance.
Room noise and room reflections are different problems. A curtain may help reduce some reflections, but it will not reliably isolate the room from traffic outside.
For a simple comparison:
- Record the same sentence in your usual position.
- Move away from a bare wall or reflective corner.
- Record it again using the same microphone distance and input level.
- Compare how clearly you hear the beginning and end of each word.
Choose the position based on the recording, then arrange the camera around it where possible.
3. Bring the microphone closer and keep the distance consistent
A microphone beside a camera across the room has to capture your voice along with more of the surrounding space.
Moving an appropriate microphone closer can improve the balance between direct speech and room sound. However, the best position depends on the microphone and how you use it.
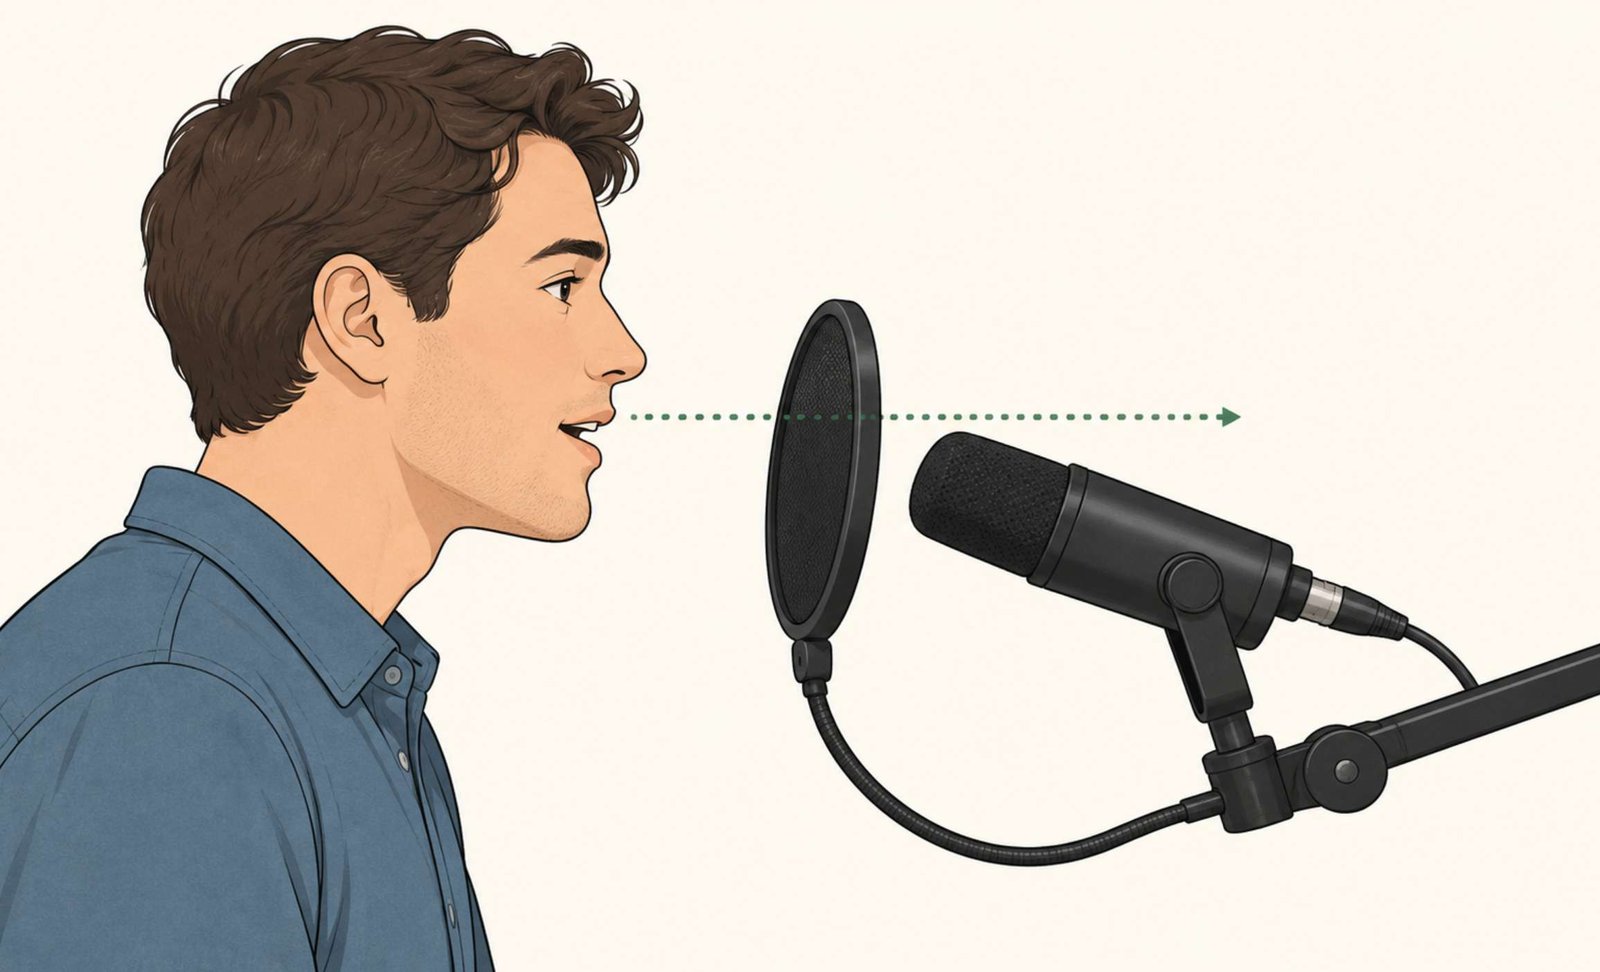
For a close-address desk microphone, try approximately 10–15 centimeters as an initial test position, provided that suits the manufacturer’s instructions. This is an experiment, not a universal distance for every microphone. A lavalier or an overhead microphone requires a different setup.
Check which part of the microphone you should speak toward. Some models receive sound from the end; others are designed to be addressed from the side.
Keep your position steady while speaking. Leaning back to read a screen and forward to emphasize a point can change both volume and tone.
With many directional microphones, moving very close increases bass through the proximity effect. Shure discusses this trade-off and the importance of consistent positioning in its vocal recording guide.
If plosive sounds cause bursts of air, try a pop filter and place the microphone slightly outside the direct airflow from your mouth. Record another sample after every adjustment.
4. Run a short test before recording the full video
A useful test includes more than saying “one, two, three.”
Record around 30 seconds containing:
- A sentence at your normal speaking volume.
- A sentence with the strongest emphasis you expect to use.
- Words containing “p,” “b,” and “s” sounds.
- A short pause while you remain in position.
- A sentence delivered while making your usual gestures.
For example:
Before publishing the video, check the picture, background music, and spoken instructions. This next point is especially important: preview the finished file before you upload it.
Listen with headphones and watch the recording meter.
For a typical digital recording setup, leaving space below the maximum level helps accommodate unexpected peaks. Audacity recommends aiming for a maximum recording peak around −6 dB. A range around −12 to −6 dBFS for stronger test phrases is a practical starting point here, rather than a final loudness target. Audacity explains recording levels and clipping.
“dBFS” describes level relative to digital full scale. It is not the same as your computer’s volume percentage.
If the test distorts, reduce the input gain and record again. Lowering the playback volume afterward does not undo distortion already captured.
Also confirm that the recording application is using the intended microphone rather than a webcam or laptop microphone.
5. Record in sections that are easy to repair
Organize the script into short sections built around one idea or action.
If you make a mistake, pause and repeat the complete sentence. This gives you a cleaner replacement than immediately restarting halfway through a word.
Leave a little space before and after each take. Avoid reaching for the keyboard while saying the last word: the movement may introduce noise or change your position.
At the beginning or end of the session, record several seconds of the room while remaining quiet and keeping the recording setup unchanged. This gives you a sample of the background sound that may be useful during editing.
Keep a simple take log:
| Section | Preferred take | Note |
|---|---|---|
| Introduction | Take 2 | First take contains a desk bump |
| Main explanation | Take 1 | Clear delivery |
| Closing instruction | Take 3 | Earlier take omits one step |
This example is an organizational template, not a report from a recording session.
Before packing away the equipment, listen to the introduction, the loudest passage, and the ending. If an important section is damaged, recording it again while everything is still in place is usually easier than recreating the setup later.
6. Make a clean dialogue edit before adding music
Start by assembling the best takes. Remove mistakes, duplicated phrases, accidental noises between takes, and pauses that interrupt the explanation.
Keep enough breathing room for the delivery to sound natural. Removing every breath and every pause can make an instructional video feel rushed.
Listen across each cut. If the edit produces a click or an abrupt change in background sound, adjust the edit point or use a short fade where appropriate.
Then balance noticeably different sections using clip gain or volume automation. Raise a quiet sentence or lower an unusually strong phrase before asking a compressor to manage the entire recording.
Keep background music muted during this stage. You need to hear what is happening in the voice track.
If you recorded separate microphone audio alongside the camera’s audio, make sure the intended track is synchronized. Once it is aligned, avoid accidentally leaving a delayed camera track playing underneath it.
Check synchronization near both the beginning and the end of the video, especially for longer recordings.
7. Reduce steady noise carefully in Audacity
Audacity’s Noise Reduction effect is designed for relatively constant background sounds, such as steady fan noise or hiss. It is less suitable for irregular disturbances such as passing traffic or isolated clicks.
The effect needs a sample containing the unwanted noise without speech. The official Noise Reduction manual explains the process and its limitations.
For a basic cleanup:
- Select a short section containing only the background noise.
- Open Effect → Noise Removal and Repair → Noise Reduction.
- Choose Get Noise Profile.
- Select the speech section you want to process.
- Reopen Noise Reduction.
- Start with modest reduction and use Preview.
- Increase the amount only if needed.
Listen to quiet words and sentence endings. Excessive processing can introduce watery or metallic artifacts.
The Residue option lets you hear what would be removed. If recognizable speech appears in that preview, reduce the processing strength or sensitivity.
Apply the result only when it is less distracting than the original noise. Menu organization can vary by version.
8. Use AI speech enhancement as an alternative to test
If you edit in Premiere, Enhance Speech provides another approach to dialogue cleanup.
Select a dialogue clip, open the Essential Sound panel, and use Enhance. After processing, the Mix Amount control lets you balance enhanced and original audio. These steps are described in Adobe’s Enhance Speech documentation.
Test the effect on a representative passage before processing the full video.
Include a quiet sentence, a louder phrase, and several words with sharp consonants. Compare the original and processed versions at roughly similar listening levels.
Pay attention to whether:
- Every word remains intact.
- Sentence endings sound natural.
- Breaths remain believable.
- The voice changes unexpectedly between phrases.
- The improvement remains convincing when you stop watching the waveform.
Avoid automatically stacking several cleanup systems. If you apply conventional noise reduction and AI enhancement aggressively, it becomes harder to identify which stage is harming the voice.
Keep the simplest chain that produces a clear, natural result.
9. Adjust tone and dynamics only where necessary
Once the recording is reasonably clean, decide whether it needs tonal or volume adjustments.
A high-pass filter reduces frequencies below its cutoff. It can help with low-frequency rumble, but setting it too high can also remove useful body from the voice. Audacity explains the filter’s behavior.
If rumble is audible, a cutoff around 70–80 Hz is a possible starting experiment for this workflow. Compare with the effect bypassed and lower or remove it if the voice becomes thin. Skip the filter if it does not improve the recording.
A compressor reduces dynamic range by controlling louder portions of the signal. Its threshold determines when compression begins, while its ratio affects how strongly those portions are reduced. See Audacity’s compressor documentation.
For a first experiment, try a gentle ratio around 2:1 and adjust the threshold so stronger phrases receive some reduction while ordinary speech remains natural. Exact settings depend on the recording and the compressor.
If breaths and background noise become too prominent, reduce the processing and reconsider the level adjustments you made earlier.
10. Keep background music underneath the explanation
Add music only after the voice is understandable on its own.
Choose a passage with detailed instructions and introduce the music at a low level. Listen for whether the words become harder to follow.
A track with prominent vocals, busy percussion, or strong melodic movement may compete with the speaker even when its overall level is modest. Try a simpler arrangement or leave music out during information-heavy sections.
There is no single music-fader position that works for every combination of voice and soundtrack.
Ducking lowers the music during speech. In Premiere, the Essential Sound panel can identify dialogue and generate volume changes for music tagged appropriately. Adobe documents automatic ducking here.
Review those changes afterward. Music that rises sharply during every short pause can become distracting.
For a straightforward tutorial, manual volume adjustments may be sufficient: lower the music before the explanation begins, keep it restrained during speech, and let it rise gently during an appropriate transition.
Finally, listen at a modest playback volume. If you understand the narration only when everything is loud, revisit the balance.
11. Distinguish peak level from overall loudness
The highest peak in a recording and its perceived overall loudness describe different things.
A track with one loud desk bump can have a high peak while most of the narration remains quiet. Raising or lowering the whole track based only on that peak will not fix its internal balance.
Loudness normalization uses a loudness measurement, commonly expressed in LUFS, to adjust the overall level toward a chosen target. It does not replace editing uneven sentences or controlling excessive peaks. Audacity’s loudness-normalization documentation explains this distinction.
If you use a loudness target, apply it consistently and check the finished mix afterward. Do not treat a default preset as a guarantee that your particular recording is ready.
Watch the output meter while speech, music, and effects play together. Tracks that are acceptable separately can combine into an overloaded mix.
Use peak control where needed, but listen to what it does. If a limiter is repeatedly making the voice sound squeezed or distorted, reduce the level or return to the earlier balance.
12. Export and check the actual video file
Do not judge the finished audio only inside the editing timeline.
For a conventional YouTube upload, MP4 video with AAC-LC audio at 48 kHz is one option in YouTube’s recommended encoding guidance. Its published table recommends 384 kbps for stereo audio. These are encoding recommendations, not a recipe for repairing a poor recording. See YouTube’s upload settings.
A single speaker can be recorded on a mono track and placed centrally in a stereo mix. Confirm that the voice is audible through both left and right playback channels rather than accidentally appearing in one ear only.
Open the exported file separately and check:
- The first spoken sentence.
- The quietest section.
- The strongest emphasis.
- Every transition into background music.
- Audio synchronization.
- The final sentence and fade-out.
Listen on headphones and a phone speaker. Keep the playback level comfortable and reasonably consistent between checks.
Then upload privately or as unlisted and review the processed version before publication. This adds a check of the actual viewing experience rather than relying exclusively on the local export.
13. Use a focused troubleshooting pass
If a problem remains, return to the stage most likely to cause it.
| Remaining problem | What to inspect next |
|---|---|
| Voice sounds distant | Microphone distance and room reflections |
| Loud words distort | Original recording, effect chain, and final output peaks |
| Voice sounds metallic | Noise reduction or enhancement strength |
| Voice changes tone between sentences | Movement during recording or mismatched takes |
| Music obscures instructions | Music level, arrangement, and ducking |
| Voice appears in only one ear | Source-channel mapping and panning |
| Audio drifts out of sync | Source recordings and synchronization across the timeline |
For example, imagine a tutorial with steady fan noise, two quiet sentences, and an introduction that is much louder than the main explanation.
A sensible repair attempt would be to reduce the steady noise modestly, adjust the quiet sentences individually, and rebalance the introduction. Applying stronger compression to everything may make the fan more noticeable without fixing the underlying edit.
That is a hypothetical diagnosis, not a measured result. Use your own recording to decide whether each change helps.
For the next session, save a short setup note: room position, microphone orientation, approximate distance, input level, and the test phrase you used. Repeating a setup that already works gives you a more dependable starting point than rebuilding the sound from scratch for every video.